How To Host Private Cloud Storage - Nextcloud On AWS
Let's install and run Nextcloud in AWS on the Graviton (AWS) EC2 instance. The primary file storage will be an S3 bucket with double file encryption. And it's all free (only if your AWS Account is eligible for Free Trial, and you stay within it).
What will be used?
- Nextcloud - free and open-source
- Graviton EC2 t4g.small instance - up to 750 hours free per month, until 31. DEC 2026.
- EBS - 30 GB included in the free tier
- Elastic IP - 750 hours per month included in the free tier
- S3 Storage - 5GB included in the free tier
- IAM - free
- A domain (or subdomain) - host on your own domain, or get a subdomain for free – noip, duckDNS or similar
- Cloudflare (only if you have your own domain) - free
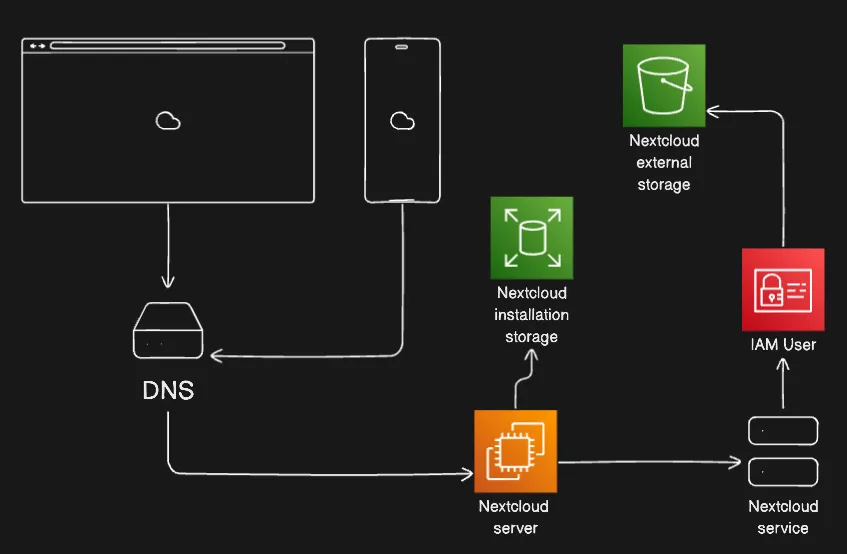
Simple architecture
You can also try to do everything with t2.micro or t3.micro (available in Bahrain and Stockholm) EC2 instances. Everything is the same except for instance launch.

Nextcloud, with the basic install, is consuming just shy of 900 MB of memory while idling.
Graviton
As per documentation – AWS Graviton (ARM Processor) is a family of processors designed to deliver the best price performance for your cloud workloads running in Amazon Elastic Compute Cloud (Amazon EC2).
We will use t4g.small instance, which has:
- 2 GiB of Memory
- 2 vCPUs
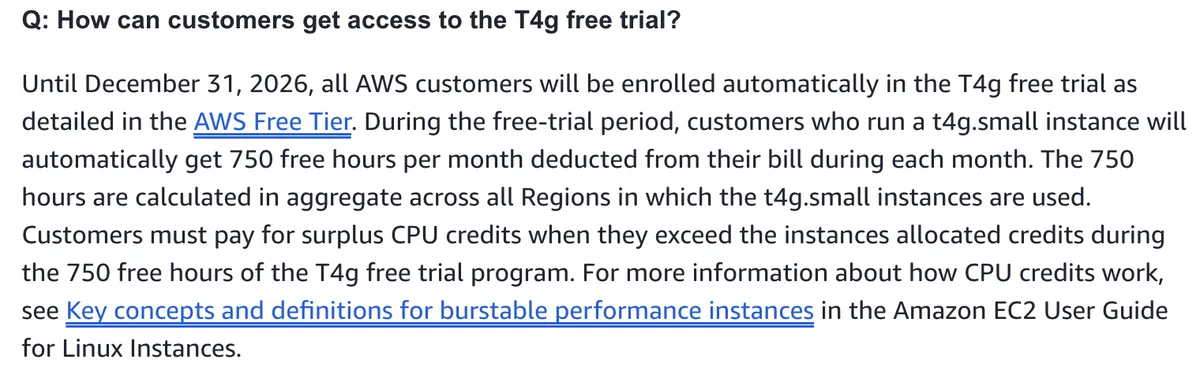
AWS EC2 FAQs - https://aws.amazon.com/ec2/faqs/#t4g-instances
Also, make sure you choose the right settings to avoid unintended charges to your account. Just follow along and you'll be good to go.
https://x.com/kaumnen/status/1783939334506258605
Create graviton EC2
Login to your AWS account. Head over to the EC2 console. Click Launch Instances.
Graviton EC2 t4g.small config
- Name: nextcloud-root (you can set this to your liking)
- AMI: Ubuntu Server 24.04 LTS (HVM), SSD Volume Type
- Architecture: 64-bit (Arm)
- Instance type: t4g.small
- Key pair: Proceed without a key pair
- Network (click Edit):
- New security group
- Open ports:
- 22 - EC2 Instance Connect (consider restricting source IPs, more info below)
- 80 - Initial HTTP Nextcloud setup (Source 0.0.0.0/0)
- 443 - HTTPS Apache container (Source 0.0.0.0/0)
- 8443 - SSL/TLS Nextcloud (Source 0.0.0.0/0)
- Storage: 1x 30GB gp3 (Nextcloud needs about 5GB of space for storage. Feel free to adjust this to your needs. 8GB is the minimum)
- Advanced settings:
- Credit specification: Standard (take a look at the tweet above for more info)
You can restrict access for port 22. I will be using EC2 Instance Connect to connect to the instance directly from the AWS Console.
If you want to restrict access to the port 22:
- Go to this docs page – https://docs.aws.amazon.com/vpc/latest/userguide/aws-ip-ranges.html#aws-ip-download
- Click on the link for the ip-ranges json file
- Search for EC2_INSTANCE_CONNECT
- Find your region and CIDR IP. You can set that CIDR IP address as the source IP for port 22 in the security group.
- As of now (25. APR 2024.) CIDR IP for the eu-central-1 (Frankfurt) region I will be using is: 3.120.181.40/29
You can leave everything else as default. Click Launch instance.
Update - Sept. 2024
You can use cipr - a CLI tool I created to find and filter CIDR ranges from various cloud providers. An example command for the CIDR needed in this case:
cipr aws --filter-service EC2_INSTANCE_CONNECT --filter-region eu-central-1
If you’d like to learn more about cipr - check the docs at: https://cipr.sh
Elastic IP and Domain (sub-domain) setup
Now that we have EC2 instance, we can first create an Elastic IP, and after that an A DNS record. Then we can proceed with EC2 setup. In the meantime, DNS records will be propagated.
A domain is required for Nextcloud. If you do not have a domain, you can buy one, or get a subdomain for free from services like duckdns.org, noip.com or others.
Let's start with Elastic IP.
- Find Elastic IPs in the navigation panel on the left
- Click Allocate Elastic IP address
- Click Allocate
You can now select it, go to associate Elastic IP address, select your instance, Private IP address, and click Associate.

Elastic IP Allocation
Okay. Now, we can create an A DNS record, and point a subdomain (or domain) to the nextcloud EC2 instance.
- Copy your Elastic IP address
- Create a DNS record:
- Type: A
- Name: nextcloud
- This can be whatever you want. Your subdomain will look like: Name.domain.tld
- In this case, your subdomain for Nextcloud would be: nextcloud.domain.tld
- IPv4 address: Paste your Elastic IP address
- TTL: Leave it at Auto
If you are using Cloudflare for your domain DNS management, set the Proxy status to DNS only!
Nextcloud installation
While your new DNS record is propagating, let's install Nextcloud on the Graviton EC2 instance.
Connect to the instance with the EC2 Instance Connect
- Select your instance
- Click Connect (top-right)
- Select EC2 Instance Connect
- Select Connect using EC2 Instance Connect
- Make sure ubuntu is the username
- Click Connect
Update/Upgrade system, just in case
Run this command:
sudo apt update && sudo apt upgrade
Install docker
Run this command:
curl -fsSL https://get.docker.com | sudo sh
Test docker installation
Run this command:
sudo docker run hello-world
Install Nextcloud
Run this command:
sudo docker run \
--init \
--sig-proxy=false \
--name nextcloud-aio-mastercontainer \
--restart always \
--publish 80:80 \
--publish 8080:8080 \
--publish 8443:8443 \
--volume nextcloud_aio_mastercontainer:/mnt/docker-aio-config \
--volume /var/run/docker.sock:/var/run/docker.sock:ro \
nextcloud/all-in-one:latest
Nextcloud Setup
Output of the last docker command should give you something similar to this:

Result of the last Nextcloud AIO Docker command
You can head to:
https://your_domain_that_points_to_this_server.tld:8443
because subdomain (or domain) is hopefully propagated. If browser is stuck loading, DNS records haven't been propagated yet, you need to wait until that happens. Or you can access your Nextcloud installation page at the Elastic IP, port 8080:
https://internal.ip.of.this.server:8080
You should land on a page like this:
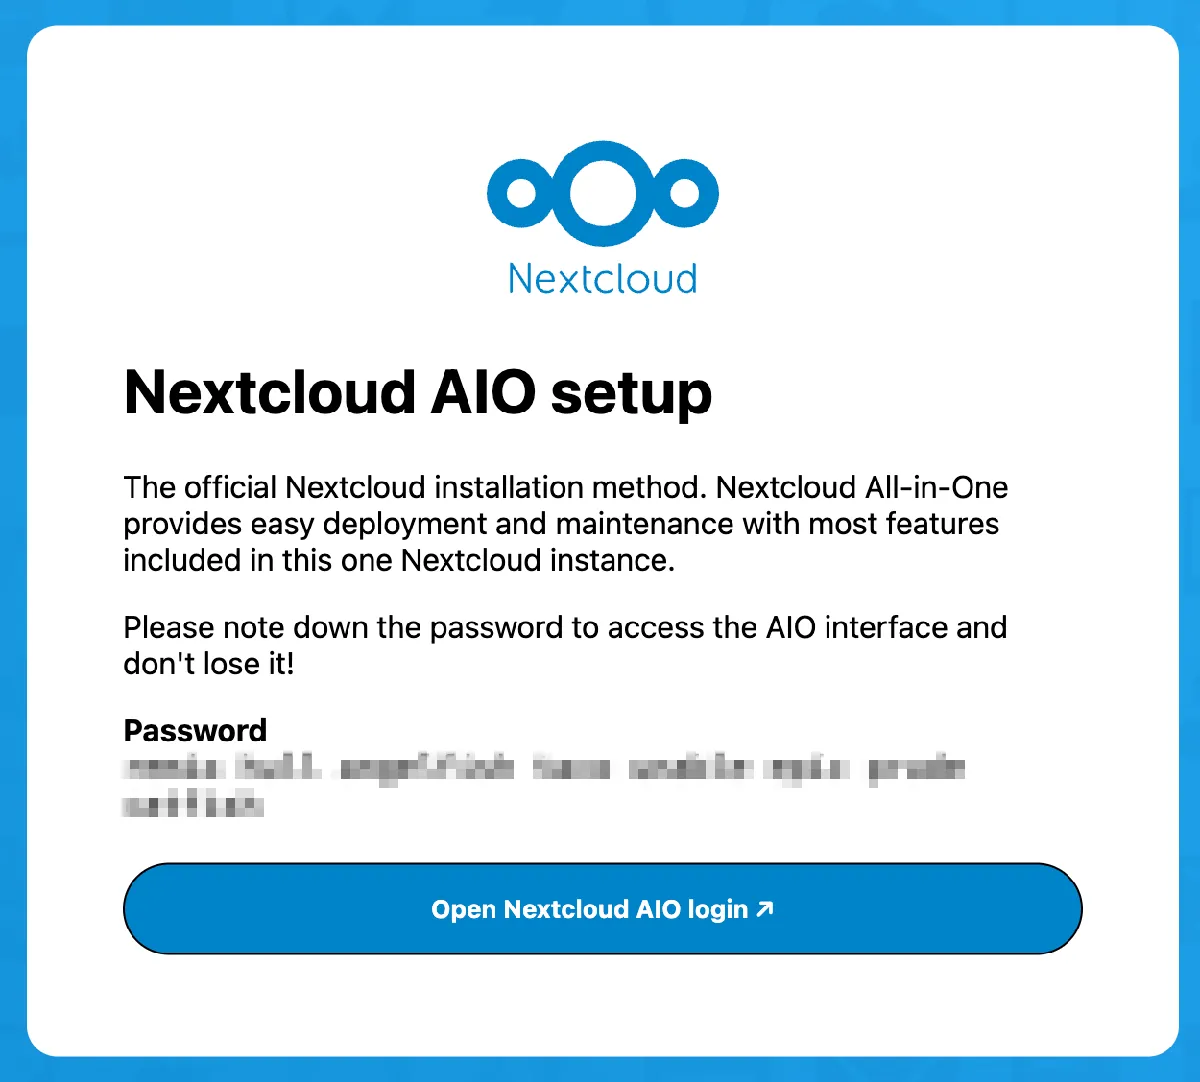
Nextcloud initial config page
- Copy your Password, open Nextcloud AIO login and login
- Type in the domain (or subdomain) you created record for previously
- Click Submit domain
After that, the only thing that is left is the actual installation.
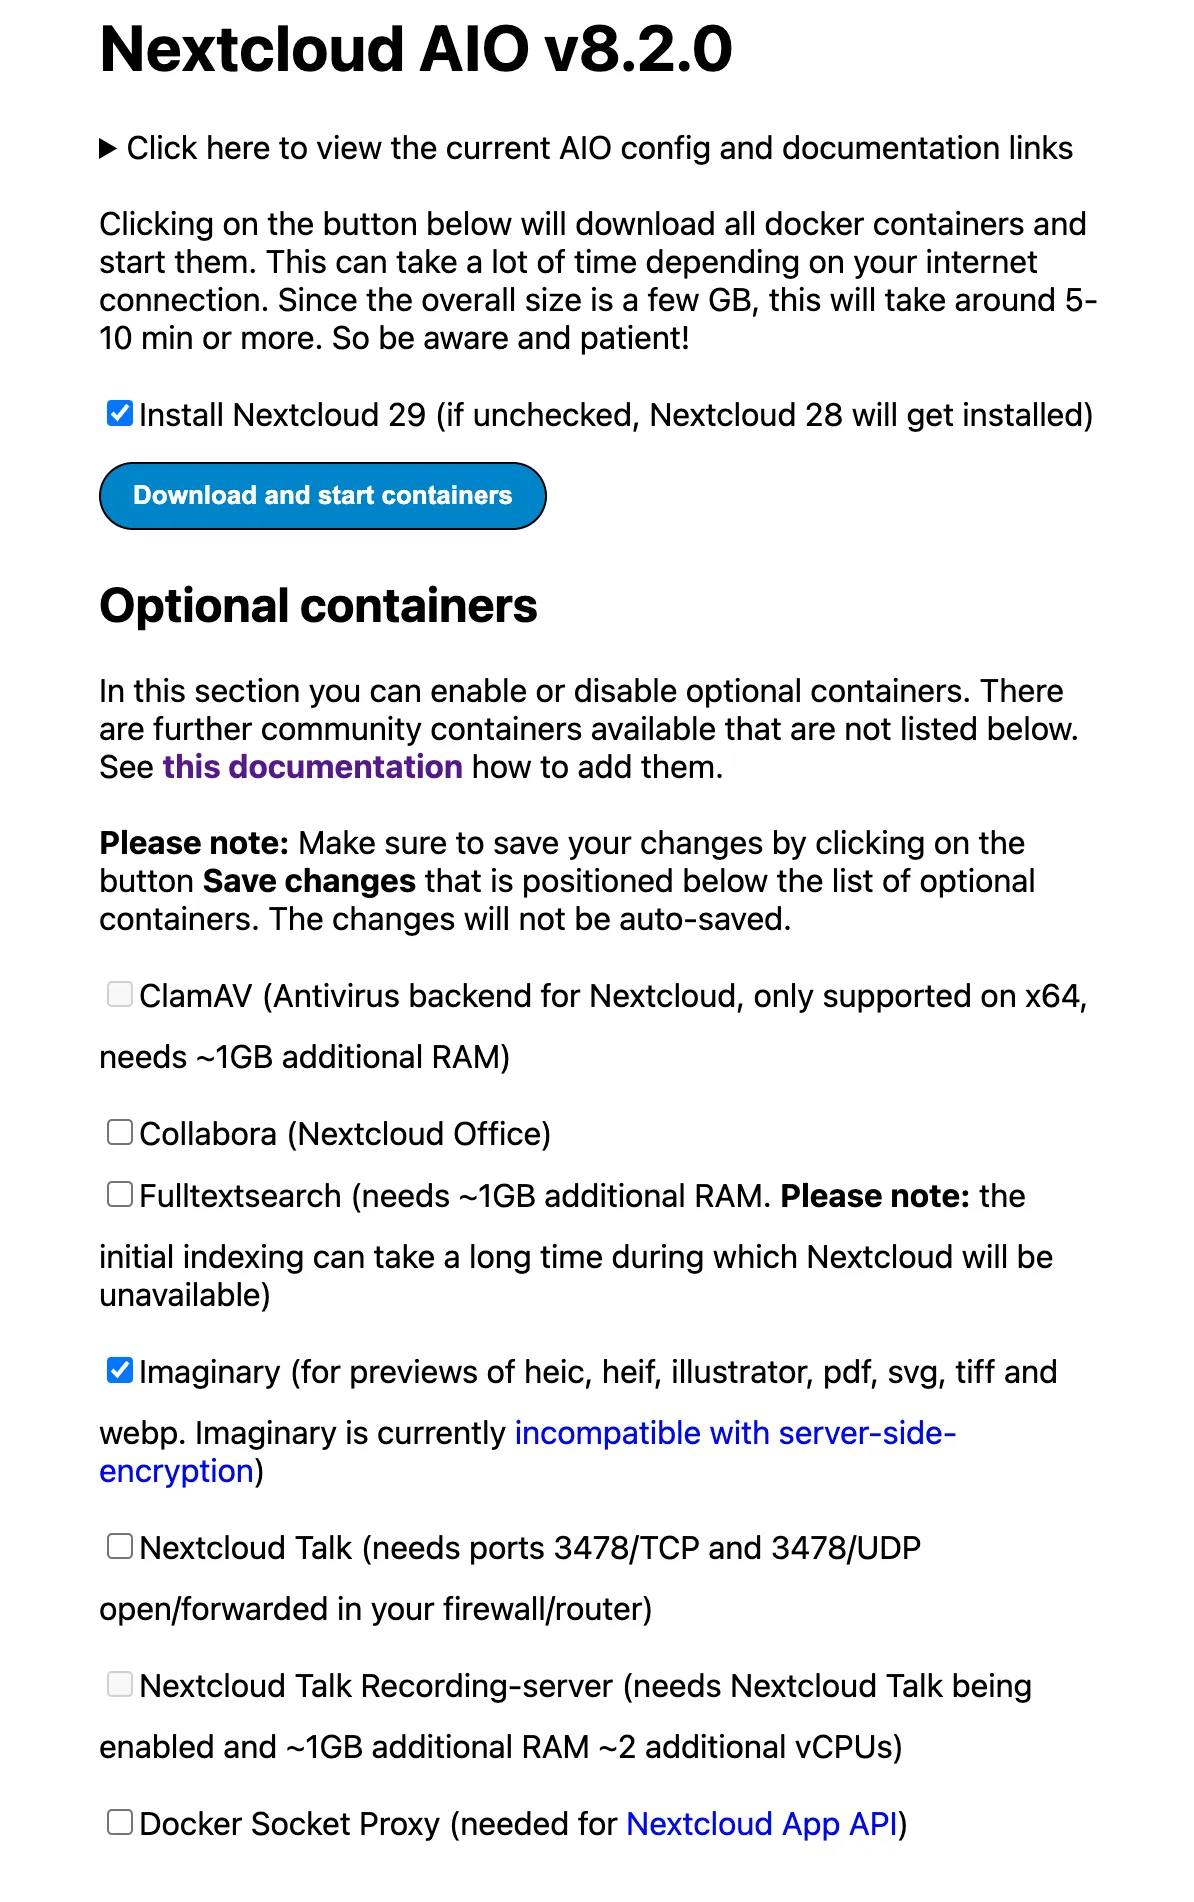
Nextcloud installation panel
- De-select everything except Imaginary, click Save changes
- Select Install Nextcloud 29. Then click Download and start containers
Wait on the page until everything is started (should restart automagically when everything is ready)
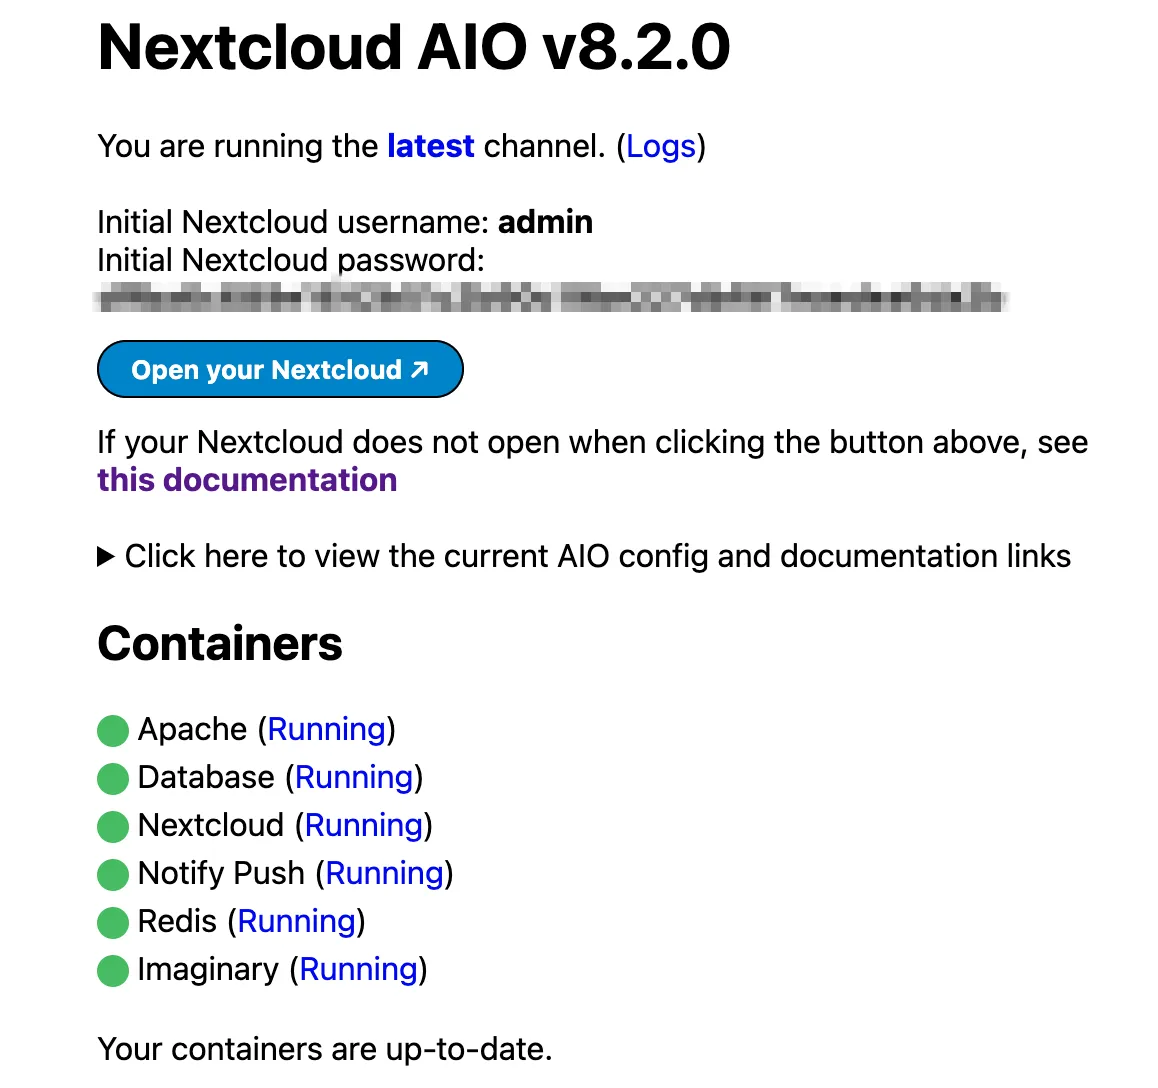
Nextcloud installation - successful
Now that everything is set, click on Open your Nextcloud and login with the info provided to you by the installation page.
Okay, now that you are logged in, first let's change the admin password.
- Profile icon (top-right)
- Administration settings
- Under Personal - Security
- Change password
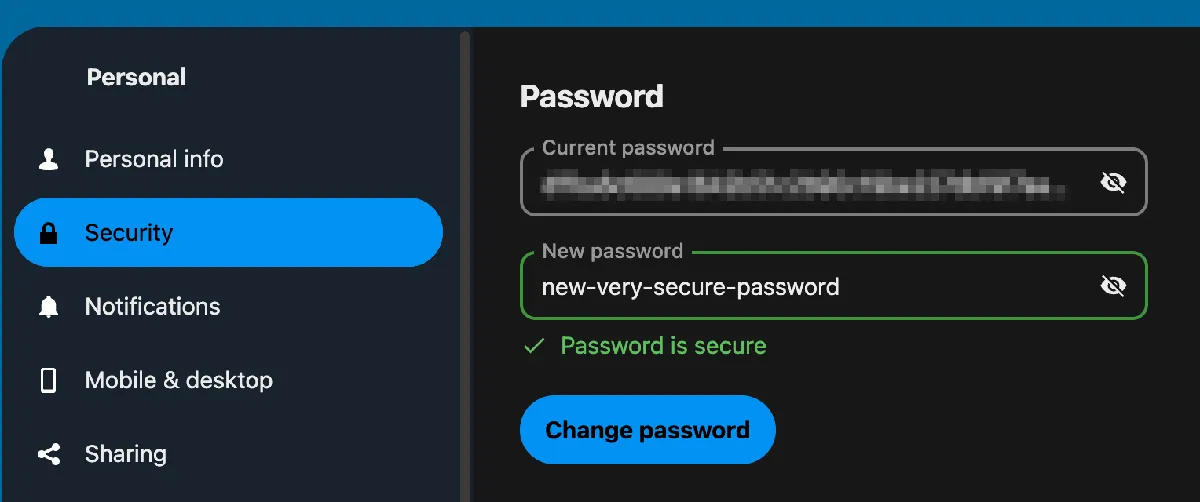
Nextcloud password change
Enable server-side encryption
- Click on your profile picture
- Click on Apps
- Click on Disabled apps and enable Default encryption module
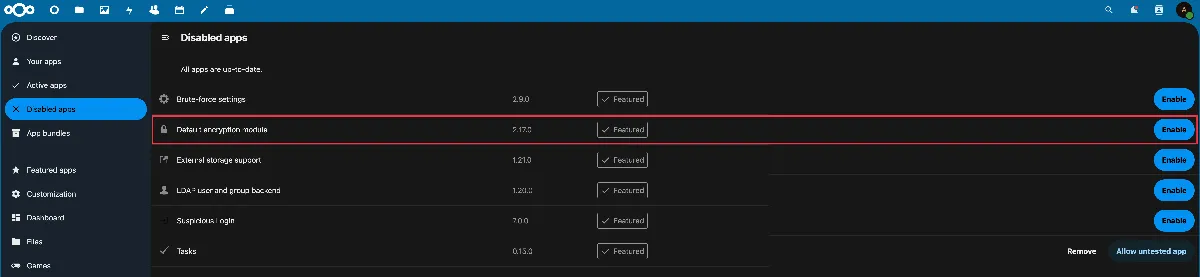
Disabled apps view. Nextcloud 29
While you are on that page, you can also enable External storage support. Or you can do that later on.
Now just enable Server-Side Encryption in the admin settings.
- Profile picture
- Administration settings
- Under Administration - Security
- Turn the slider next to the Enable server-side encryption on and click on Enable encryption
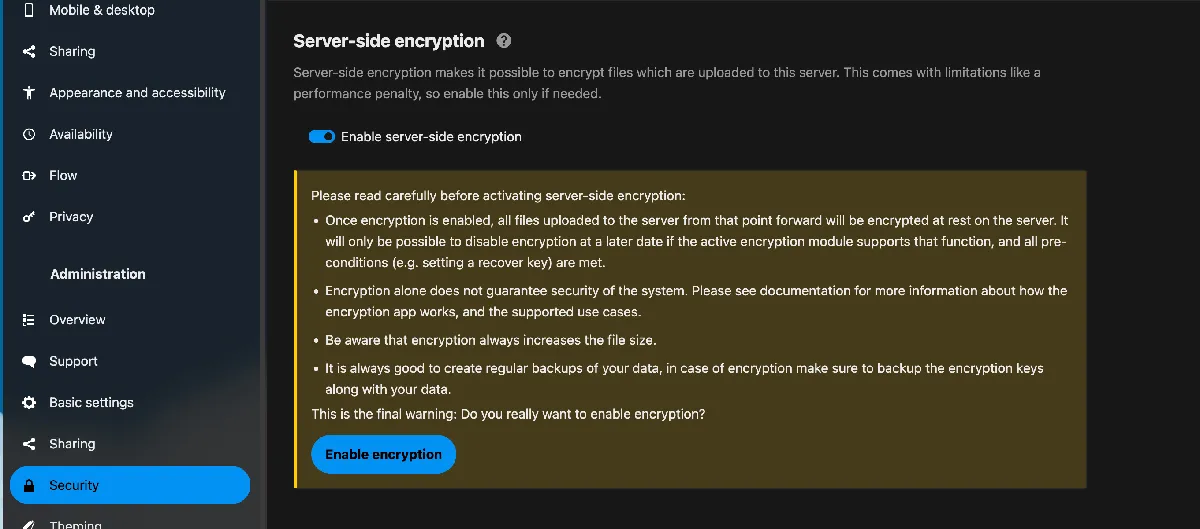
Server-Side Encryption slider
Configure S3 as an external storage
Unfortunately, the only supported option to do authN/authZ with the AWS S3 API is by using security credentials.
Let's first create an S3 bucket because we will need its ARN for a custom policy.
After that, you'll need to create a new user in the AWS Account, and security credentials after that.
S3 bucket creation
- Go to the S3 console
- Click on Create bucket
- Bucket name: Whatever you want. Keep in mind that it has to be globally unique
- Keep everything else as-is
- Create a sbucket and note the bucket name
- Copy the ARN
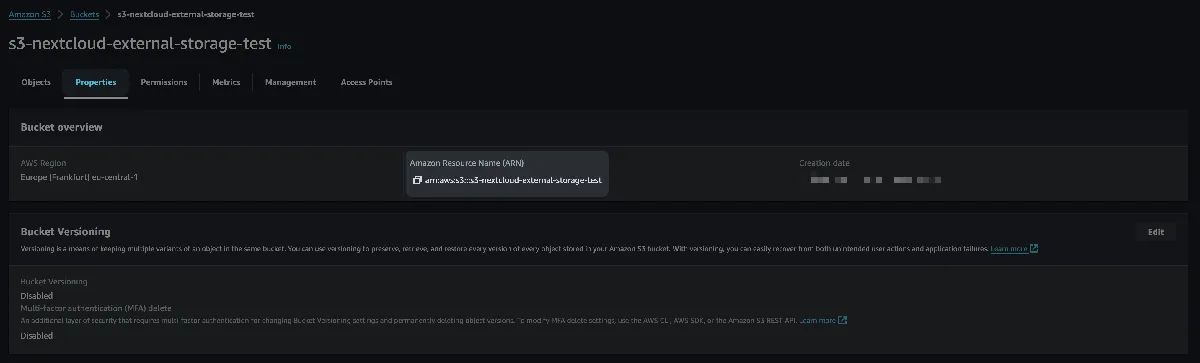
S3 bucket - ARN location
Using only common words in the S3 bucket name is a bad practice. Even if the bucket is private, you will be billed for every request, including those that result in 4xx errors (DELETE and CANCEL are free in both cases). This post discusses how even an empty AWS S3 bucket can lead to unexpected charges on your AWS bill.
IAM Policy creation
- Go to the IAM Console
- Click Policies
- Click Create policy
- Click on JSON
- Paste this JSON
{
    "Version": "2012-10-17",
    "Statement": [
        {
            "Sid": "AllowNextcloudToAccessS3Objects",
            "Effect": "Allow",
            "Action": [
                "s3:ListBucket",
                "s3:GetObject",
                "s3:PutObject",
                "s3:DeleteObject",
                "s3:CreateBucket"
            ],
            "Resource": [
                "arn:aws:s3:::s3-nextcloud-external-storage-test",
                "arn:aws:s3:::s3-nextcloud-external-storage-test/*"
            ]
        }
    ]
}
- Update resource ARNs with your S3 bucket name
- Click Next
- Type in a policy name, I chose - nextcloud-root-s3-policy
- Create policy
Your new IAM policy should look like this:
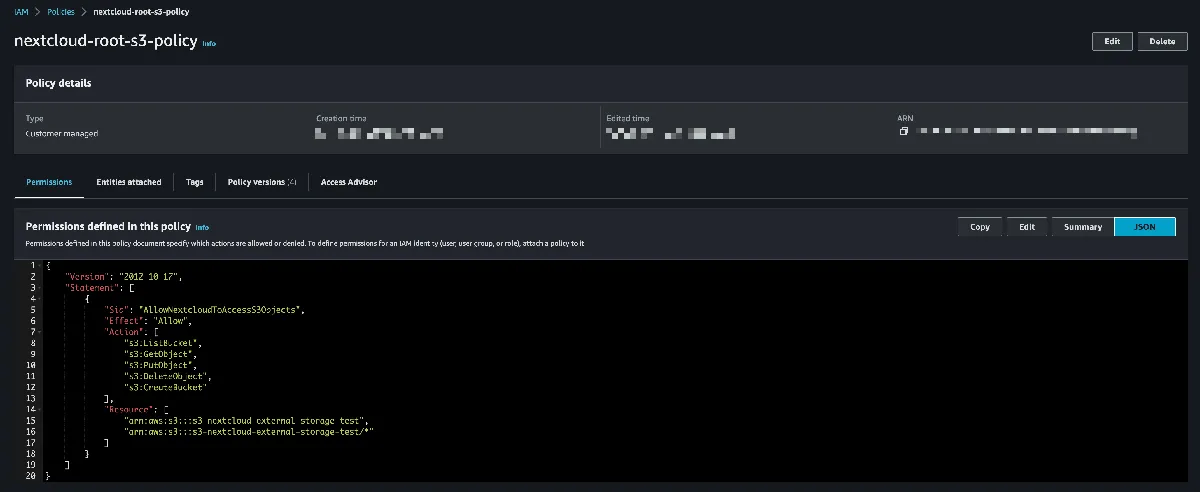
Custom IAM Policy for the Nextcloud S3 user
You can also use the AmazonS3FullAccess AWS Managed policy, but why would you give more permissions than needed to the S3 IAM User?
IAM User creation
- Click Users in the IAM Console
- Click Create user
- Type in a user name that you like
- Leave Provide user access to the AWS Management Console - unchecked
- Click Attach policies directly
- From Filter by Type choose Customer managed and choose your policy
- Or you can type in the search field the name of the custom IAM Policy that you just created
- Search and select your IAM ** policy (in my case that is nextcloud-root-s3-policy) and create your user
Now create security credentials.
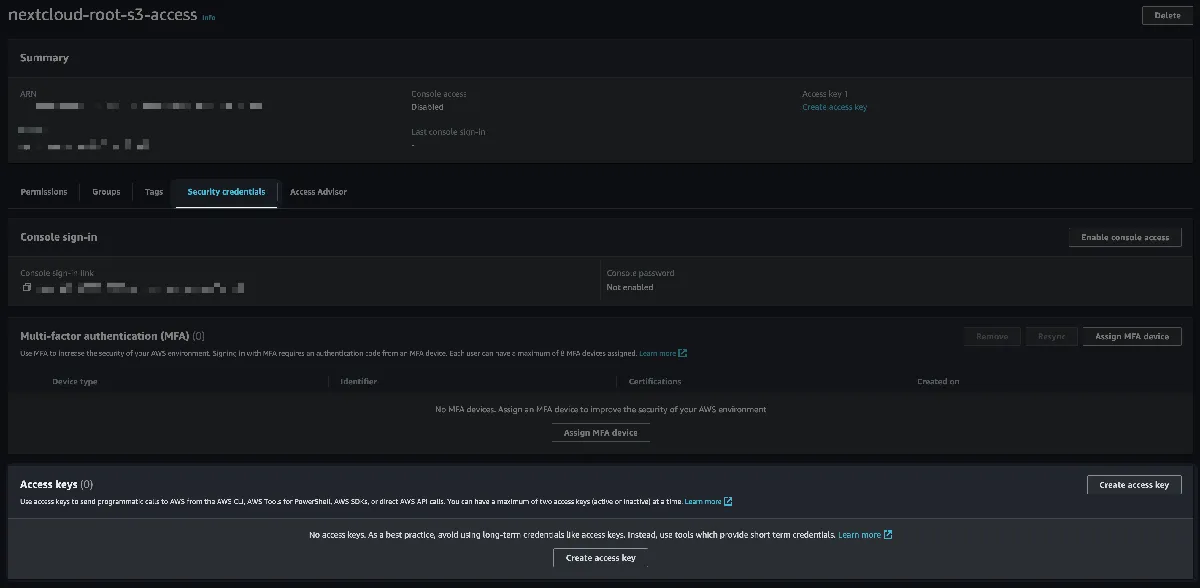
IAM User overview screen
- Click on a user you just created
- Select tab Security credentials
- In the Access keys - click Create access key
- Select Other, read all the bullet points
- Create key. And keep them somewhere secure!
Nextcloud external storage setup
Go back to the Nextcloud console and get the S3 integration done.
For External storage to work, External storage support app needs to be enabled. If you did not enable it before, do it now. It is required.

Nextcloud Disabled Apps page
After app for external storage is enabled, do the following:
- Open Administration settings
- Under Administration – External Storage
- Under the Authentication drop-down menu, select Access key
- You can leave Hostname, Port, Storage Class empty, as well as Enable Path Style and Legacy (v2) authentication unselected
- Click on the submit button on the far right
- If you see a green symbol on the left, all good!
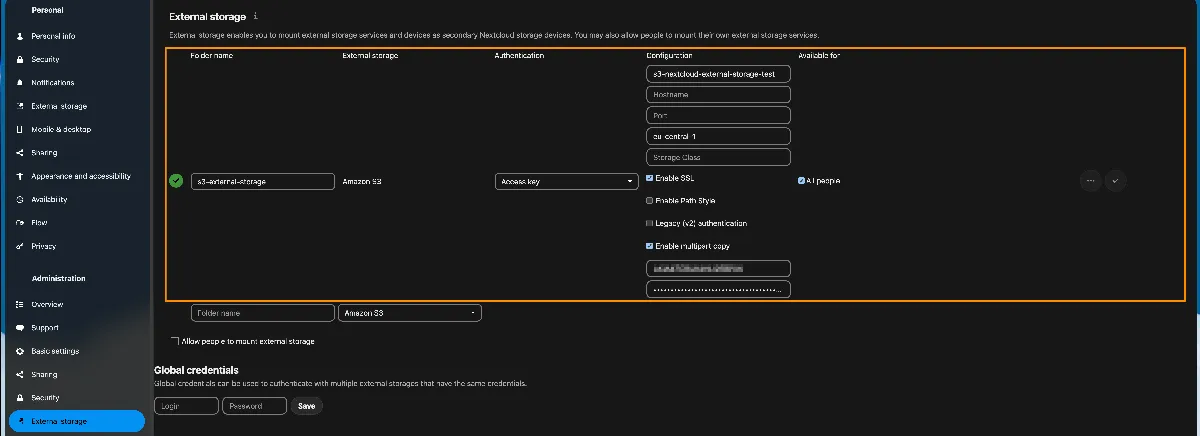
Nextcloud External storage setup page
Note that if you leave Region field empty, eu-west-1 (Ireland) will be selected by default.
Now, when you return to the Files page, you will see the S3 folder there.
Open it, try to upload something.
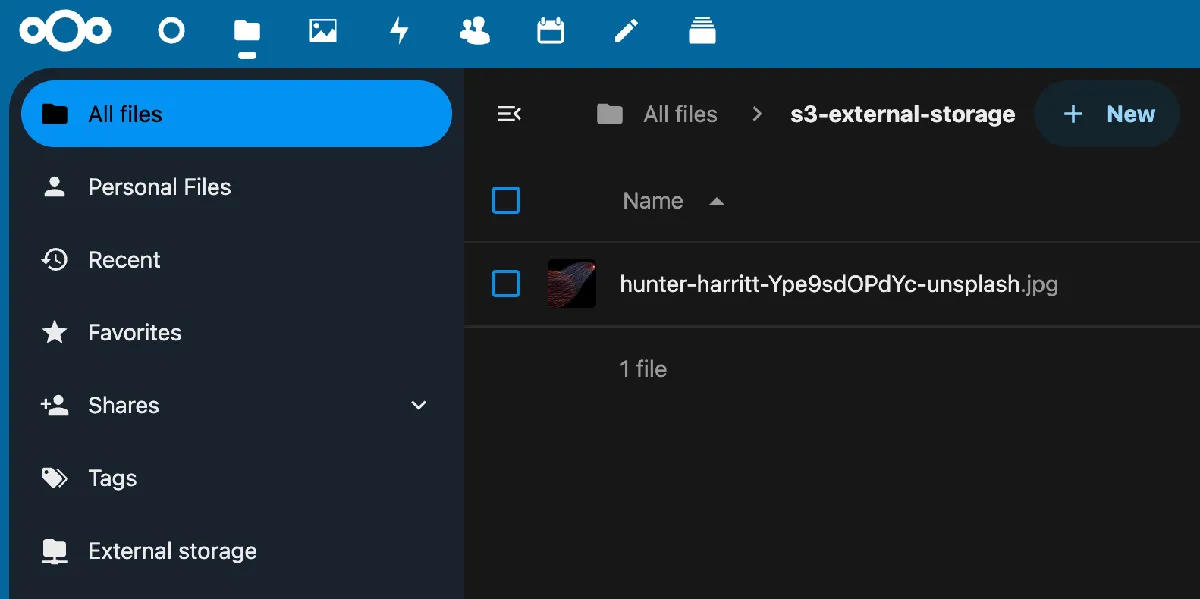
Test file uploaded to the S3 external storage.
Let's now check if we can see the file in the S3 bucket.
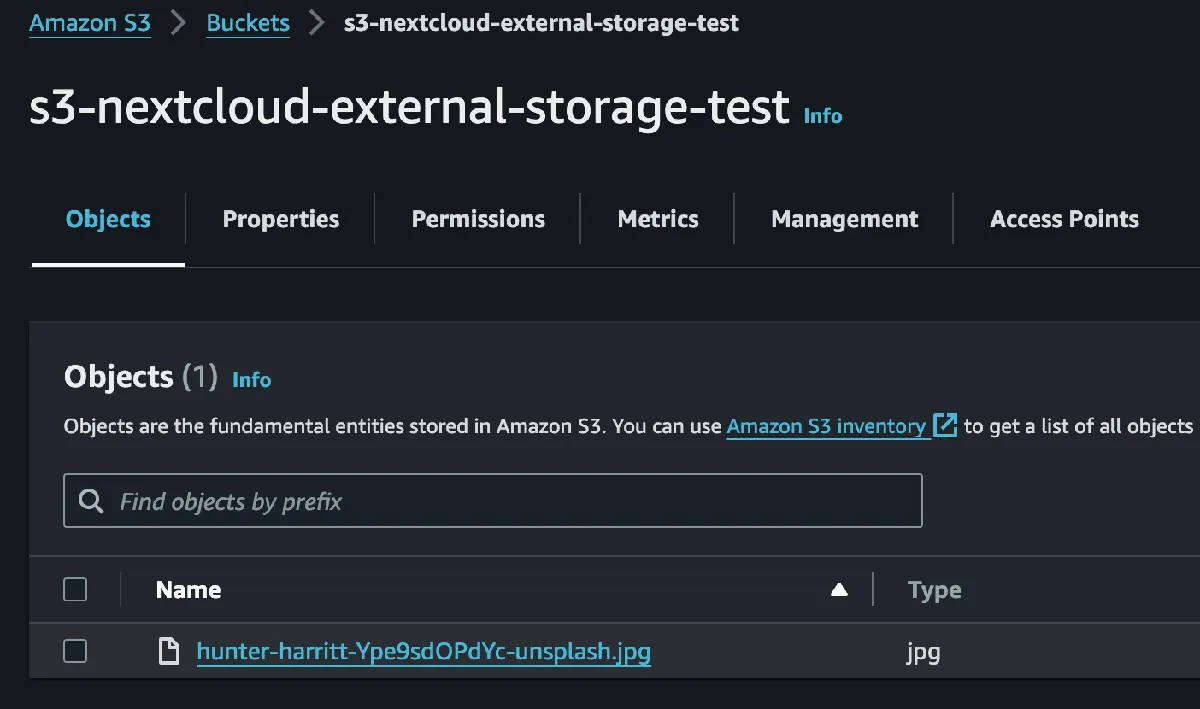
Test file uploaded from the Nextcloud instance.
Perfect. But what would happen if you:
- Selected that file in the S3 bucket
- Click Open from the menu above
It didn't open. You do have enough permissions to see the file. Why did it not open?
Because of the server-side encryption in Ghost! When you upload a file to your Nextcloud instance, it is first encrypted and then saved.
Bonus
If you are using Cloudflare, you can benefit from the free DDoS protection, and other useful features. But your website DNS record needs to be proxied. You can take a look at the gallery below to check your setup.
Before proxy is turned on in the DNS Records management panel, you need to make sure that requests to the Nextcloud bypass Cache and Rocket Loader.
How to configure a Cloudflare Cache Rule
- Login to your Cloudflare account
- Select your domain
- Select Caching in the left menu
- Cache rules
- Create rule
- Write your Rule name
- Field: Hostname
- Operator: equals
- Value: a sub-domain (or domain) where you access your Nextcloud
- Cache eligibility: Bypass cache
- Leave everything else as-is
- Deploy rule
How to disable Rocker Loader
- Select Rules in the left menu
- Configuration rules
- Create rule
- Field: Hostname
- Operator: equals
- Value: a sub-domain (or domain) where you access your Nextcloud
- Scroll down
- Click on + Add next to the Rocket loader
- Leave it turned off
- Deploy rule
Now you can use Cloudflare Trace, to check if you set the rules correctly.
- Go to the root of your Cloudflare account
- Click Trace in the left menu
- Begin Trace
- Type in your url (with the protocol - https://)
- HTTP Method: GET
- Leave everything else as-is
- Send Trace and check if the trace result is showing 2 rules you just created
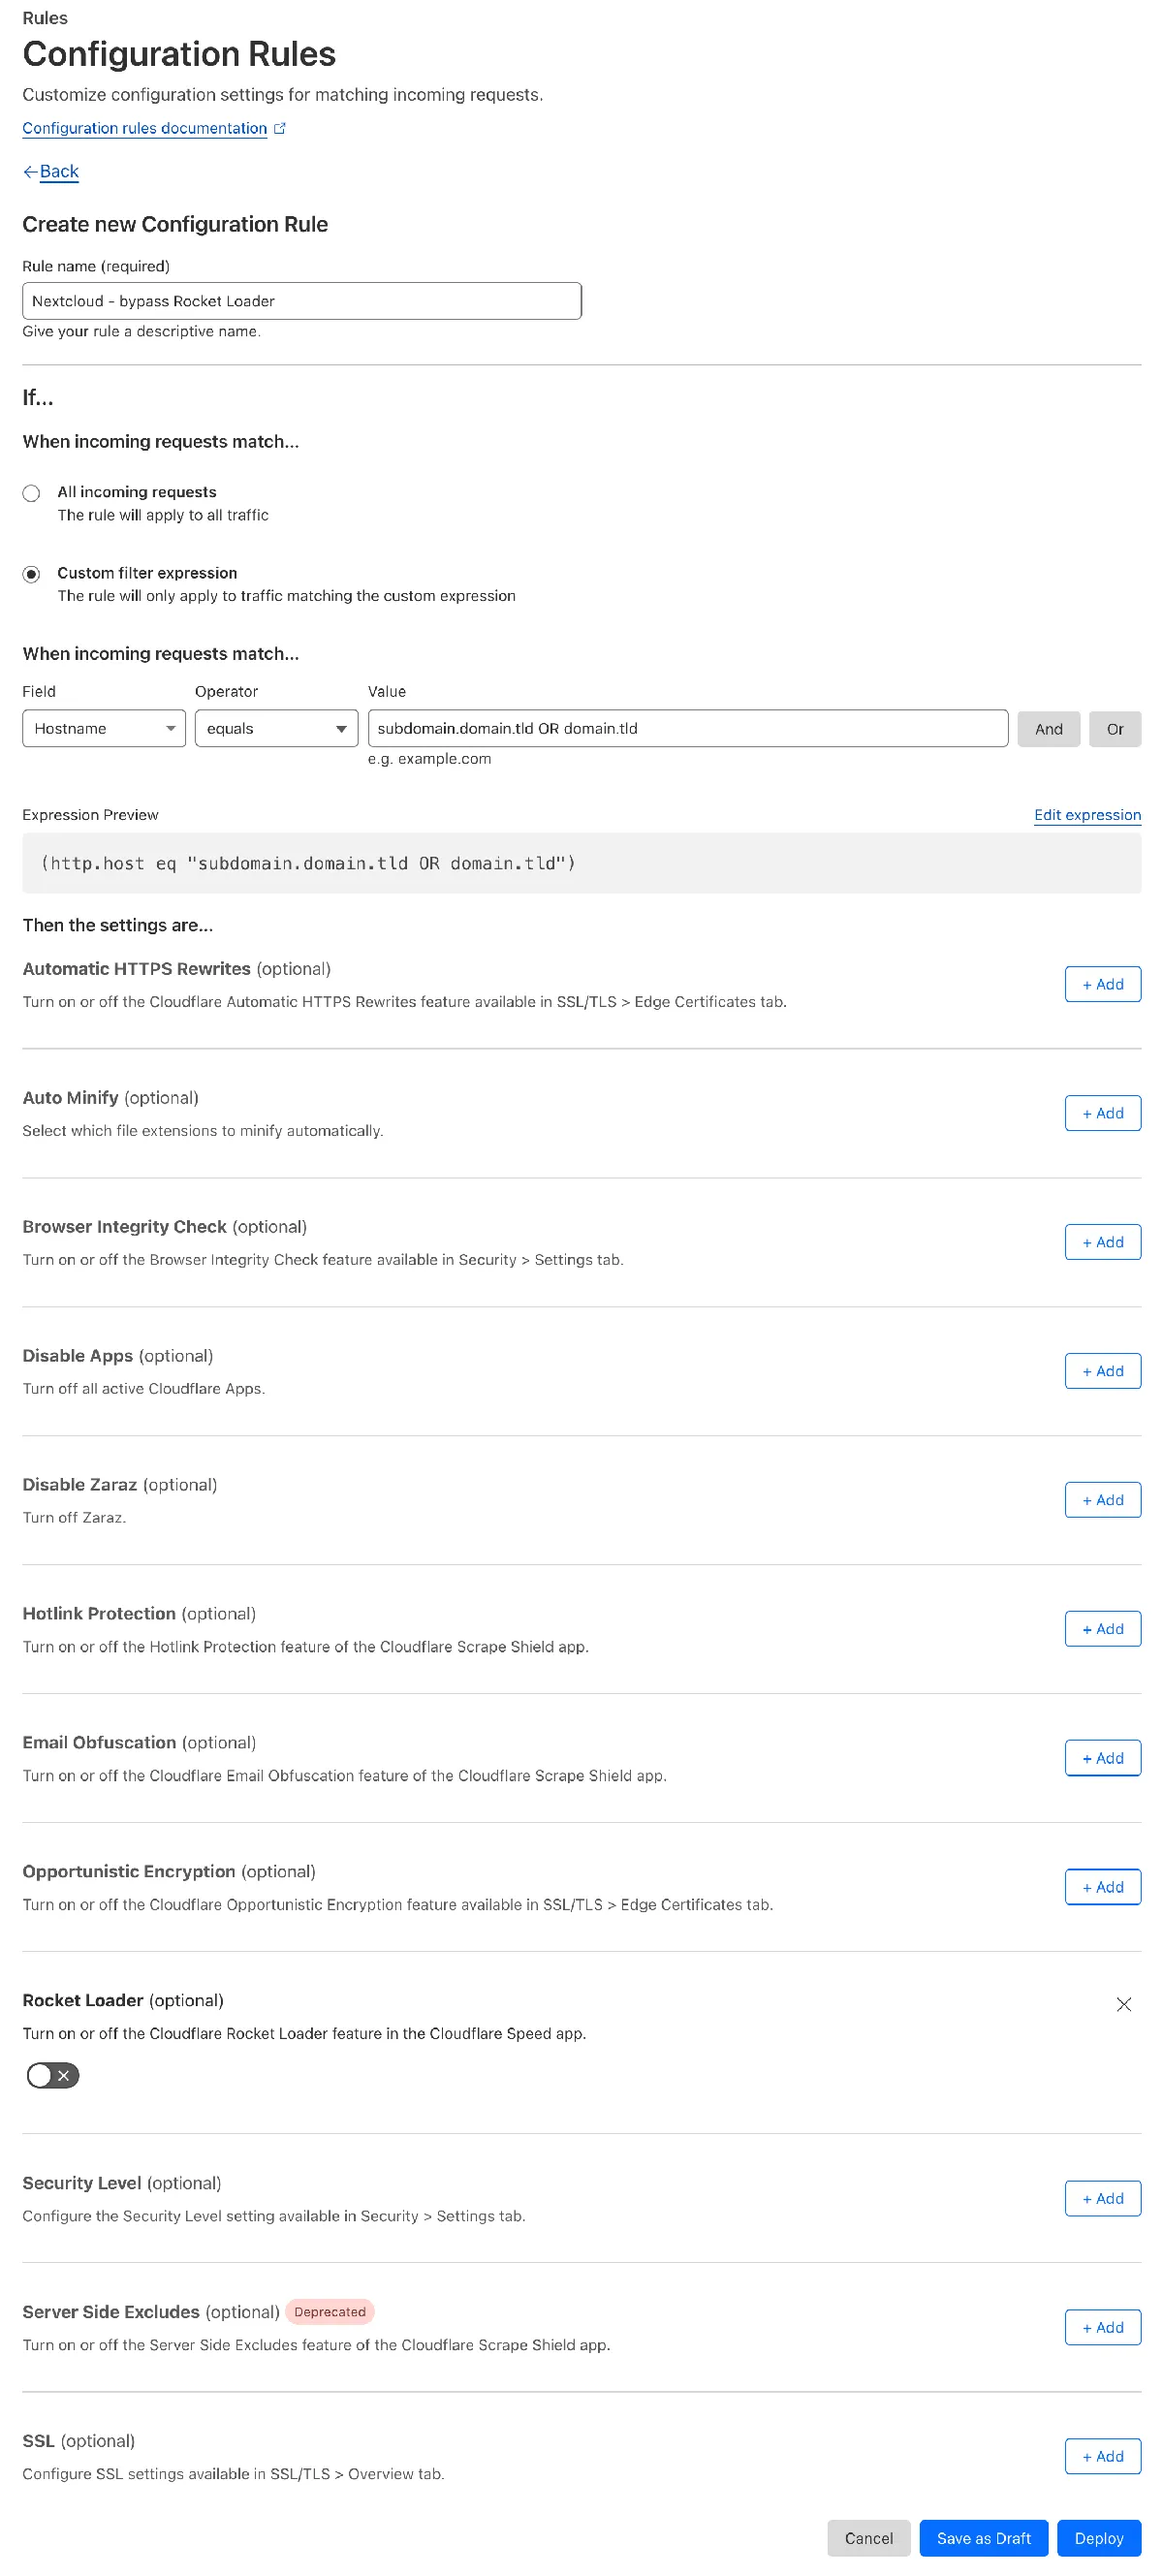
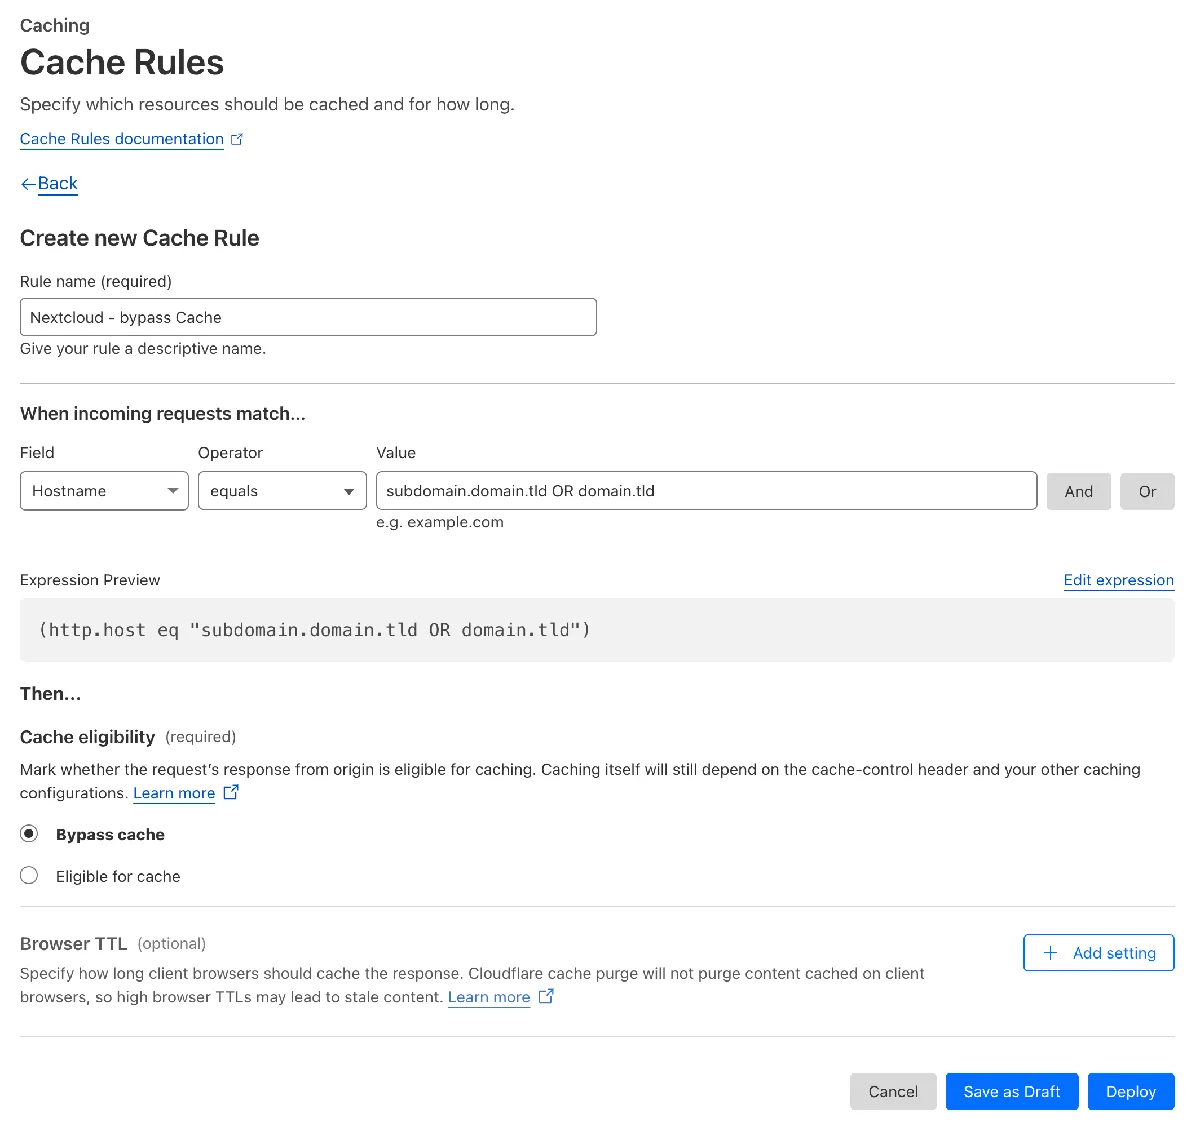
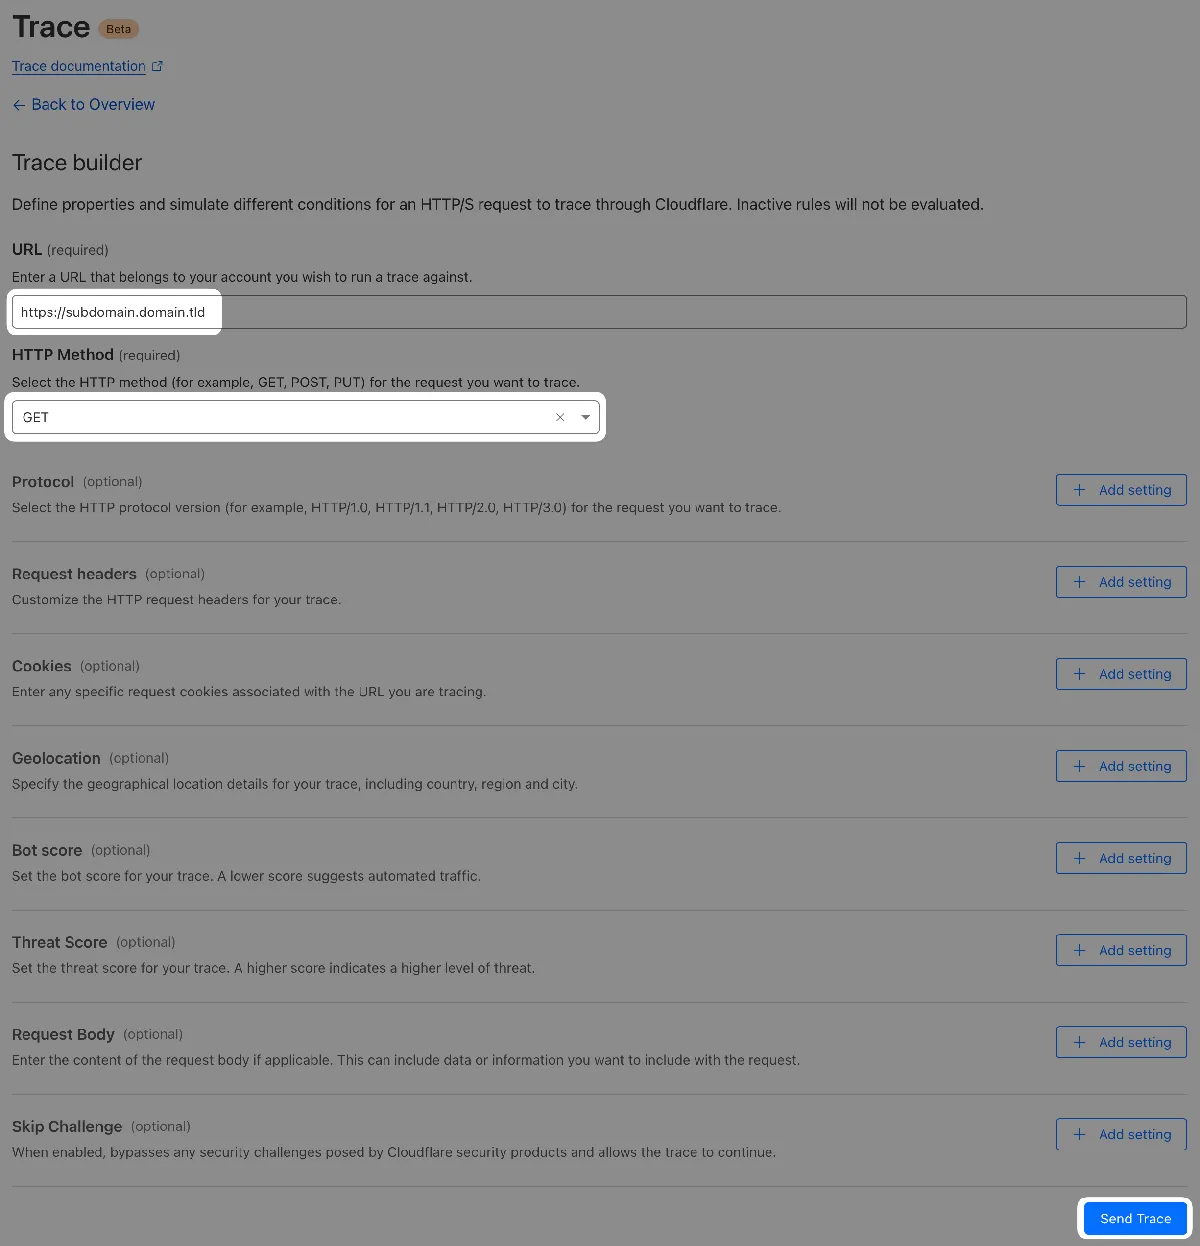
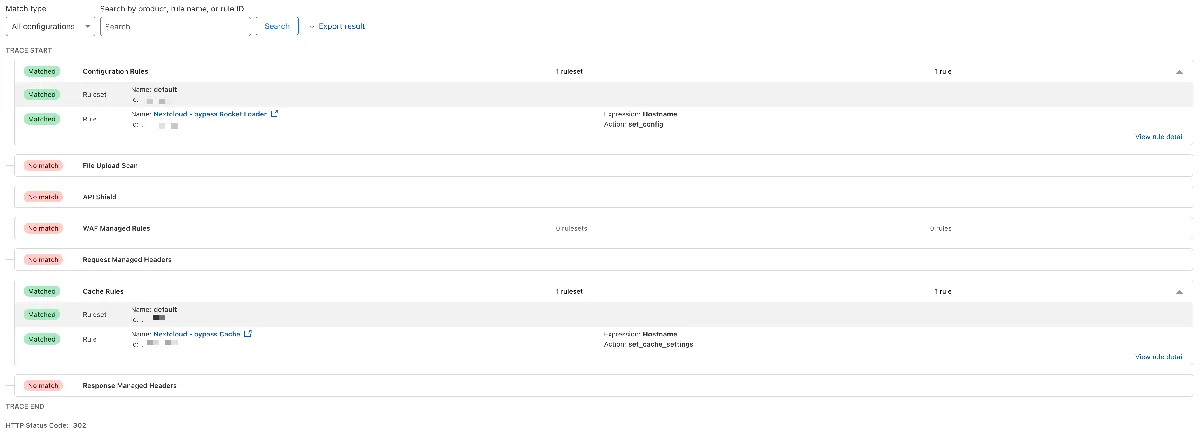
Cloudflare rules setup and Cloudflare Trace results
If it looks similar, good to go! If you haven't already – you can check your Nextcloud instance now.
Easy way to check if your website is actually going through the Cloudflare proxy and bypassing the cache is:
- Open dev tools in the browser
- Network tab
- Refresh the page
- Select the first request
- This one will be named dashboard/ probably (or your subdomain/domain)
- Select the Headers tab and check the Response Headers:
- Cf-Cache-Status: 1. DYNAMIC - NOT cached, going through the proxy 2. HIT - IS cached, going through the proxy
That's it! If you're looking to further refine and enhance your Nextcloud setup, consider the following suggestions:
- Create a folder for temporary files (e.g. 30 days temporary storage) and utilize S3 Lifecycle Policies to delete files from that folder only
- A notification mechanism which will email you a reminder about file deletion. SNS? SES? Lambda? S3 Event Notifications? EventBridge?
- Set S3 object (file) replication to another region
- S3 standard storage provides 99.999999999% durability and 99.99% availability of objects over a given year. But it's always good to have additional safety for important files.